
DIY Natural Blush: 3 Easy Botanical Powder Blush Recipes
Last updated on September 10, 2026 by Jess Healey
Originally published on June 25, 2019
Making your own blush sounds like one of those DIY projects that should be complicated. It really isn’t.
I first created these botanical powder blush recipes years ago, back when Pronounce was still making and selling skincare products. I’ve made them many times since, and the recipes themselves have held up beautifully: four simple powders, three different shades, and plenty of room to adjust the color to suit your preference.
What has changed over the years is how I talk about ingredients. I’m no longer interested in telling you that your blush needs to detox your skin, fight aging, or do anything other than…be blush.
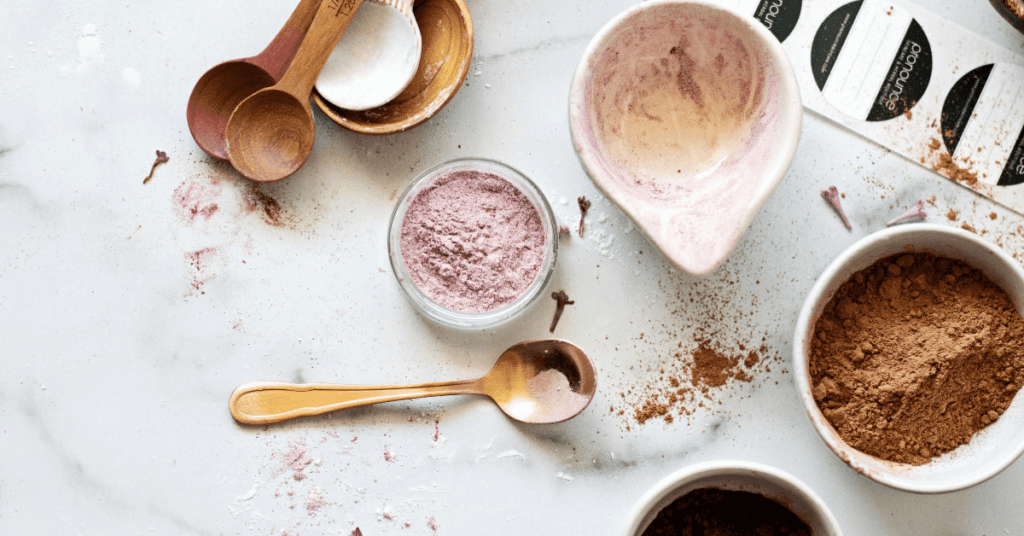
These recipes use hibiscus and beetroot powders for pink and berry tones, arrowroot powder to soften and lighten the color, and cacao powder to add warmth and depth. Blend them finely, grab a fluffy brush, and you’ve got a loose botanical blush you can customize right at home.
Why Make Your Own Powder Blush?
For me, the fun of DIY makeup has always been the ability to experiment.
These blush recipes start with just a few finely ground botanical powders, and small adjustments can noticeably change the finished shade. More arrowroot softens and lightens the color. A little cacao adds warmth and depth. Hibiscus and beetroot bring their own variations of pink, berry, and rosy tones.
And because we’re working with botanical ingredients, your finished color may not look exactly like mine. The natural pigments can vary somewhat from one batch or supplier to another, which is part of the fun, but also why I recommend starting with a small amount and adjusting from there.
The recipes below are the ratios I’ve used successfully many times, so they’re a great place to start.
Key Ingredients (and Why They’re Here)

DIY Natural Powder Blush

Equipment
- 1 Small mixing bowl
- Measuring spoons
- 1 Small whisk or spoon
- 1 Fine-mesh sieve
- 1 Clean, dry container with lid
- 1 Blush brush, for application
- Optional: Mortar and pestle or clean coffee/spice grinder if your botanical powders need to be ground more finely.
Ingredients
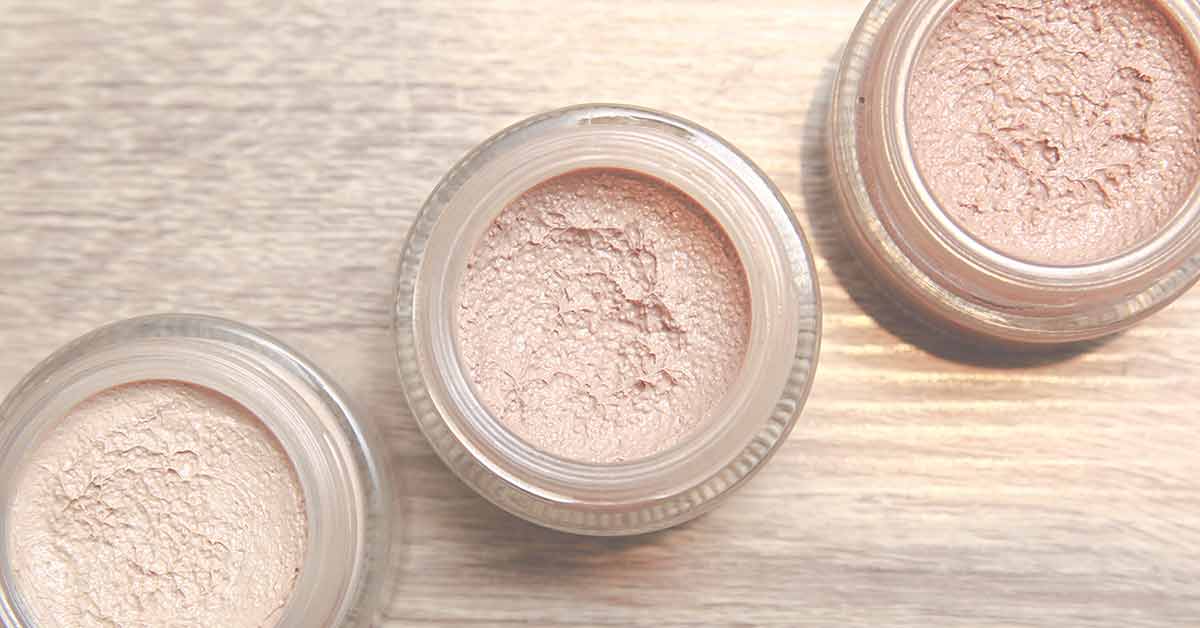
Soft Peony Pink
- 2 tsp Hibiscus flower powder
- 1 Tbsp Arrowroot powder
Dusty Rose
- 2 tsp Beetroot powder
- 1 Tbsp Arrowroot powder
Chocolate Merlot
- ½ tsp Beetroot powder
- ½ tsp Hibiscus flower powder
- ½ tsp Cacao powder
Instructions
- Choose your shade. Add the ingredients for Soft Peony Pink, Dusty Rose, or Chocolate Merlot to a small, clean bowl.
- Mix thoroughly. Whisk or stir until the powders are completely blended and the color looks uniform.
- Check the texture. The finished blush should be very finely powdered. If you see larger pieces of hibiscus or beetroot, pass the mixture through a fine-mesh sieve. If necessary, grind coarse botanical powders more finely before sifting again.
- Test the color. Apply a small amount to your skin with a blush brush. If you'd like a softer or lighter shade, add a small amount of arrowroot powder and mix thoroughly. For more depth or warmth, experiment with very small additions of the colored powders.
- Transfer and store. Spoon the finished blush into a clean, completely dry container and close tightly between uses.
Notes
- A little goes a long way. Tap a small amount onto your blush brush, remove the excess, and build the color gradually.
- Botanical powders can vary in color and texture depending on the supplier and batch, so your finished shade may look slightly different from mine.
- For the smoothest application, start with powders that are very finely ground. If your hibiscus or beetroot is coarse, grind and sift it before using it in your blush.
- Keep water and moisture out of the finished blush. Always use clean, dry tools and discard the product if you notice an unexpected change in its smell, appearance, or texture.
Getting the Right Texture
TThe ingredients may be simple, but there’s one thing that can make or break homemade powder blush: the grind of your botanical powders.
I’ve found that hibiscus and beetroot powders can vary quite a bit depending on where you buy them. Some are silky and finely ground right out of the package, while others contain larger particles that don’t blend or apply nearly as smoothly.
For the best finished blush, you want everything very finely powdered and evenly combined. If your hibiscus or beetroot seems coarse, grind it more finely with a mortar and pestle or clean coffee/spice grinder, then pass it through a fine-mesh sieve before mixing your blush.
Don’t be afraid to sift the finished mixture again, either. You’re looking for a soft, uniform powder without noticeable bits of plant material.
If your blush isn’t applying smoothly, check the texture of your powders before assuming the recipe itself is the problem.
How to Apply Botanical Powder Blush
These are loose botanical powder blushes, so expect them to behave a little differently than a commercial pressed powder.
Start with much less than you think you need. Lightly dip a soft blush brush into the powder, tap off the excess, and sweep it onto the cheeks. Build the color gradually until you’re happy with the shade.
Trust me on the gradually part. Beetroot and hibiscus can go from oh, that’s pretty to HELLO, CHEEKS surprisingly quickly.
You can apply the blush over bare skin or over your usual skincare and makeup. I’ve found that it tends to adhere a little better when there’s some moisturizer or foundation underneath, but you absolutely don’t need to coat your cheeks in oil just to make the blush stick.
If you’re already wearing a cream or liquid base, my Smooth Finish DIY Foundation would be a natural internal link right there. Then somewhere nearby we can work in the DIY Natural Face Powder for readers building more of their makeup routine from scratch.
The biggest trick is simply to experiment. Your powders, skin, brush, and the products you’re wearing underneath can all affect how the color looks and applies. Start lightly, build slowly, and adjust your recipe the next time around if you’d like your shade warmer, cooler, lighter, or deeper.
Storage & Shelf Life
Because this is a completely dry powder recipe, storage is pretty simple: keep it clean, keep it dry, and keep moisture out.
Store your finished blush in a clean, dry container with a tightly fitting lid, away from excess heat and humidity. Always apply it with a clean, dry brush and avoid introducing water into the container.
Rather than assigning an arbitrary expiration date, use your senses. If you notice an unexpected change in the color, smell, or texture, or any signs that moisture or contamination has made its way inside, it’s time to make a fresh batch.
And honestly, these recipes are so quick to mix that there’s no reason to make a giant quantity. Small batches are your friend.

FAQs (From Real Reader Questions)
A Gentle Safety Note
This recipe is shared for educational purposes and is not medical advice. Botanical ingredients can cause irritation or sensitivity for some people, so patch test before using a new ingredient or finished product on your face. Discontinue use if irritation occurs.
💝 Make It, Love It, Share It!
If you try this recipe, I’d love to hear from you! Leave a comment, share your tweet, or tag @scratch.mommy on Instagram. Want more DIYs like this? Be sure to grab my free e-book and join my Scratch Mommy community, too.
If you enjoy thoughtful, ingredient-driven DIY skincare like this, you may want to join the Pronounce Skincare newsletter. I share recipes, updates, and behind-the-scenes notes as I continue building new resources and courses.
Grab your Free copy
Want More DIY Skincare Recipes Like This One?
Sign up for my newsletter and I’ll send you my free e-book filled with tried-and-true DIY skincare recipes—perfect for beginners and experienced makers alike. You’ll also get updates when I share new formulas, ingredient deep-dives, and helpful how-to guides.


Wow!!! I’ll make it soon! Thank you
Yay! Come back and let us know how it goes ?
Such a cool and easy recipe! I cannot wait to try it! Who knew, beetroot???
Cannot wait to try this and make one for myself!
I deserve it! Thanks. Hoping my grinder makes a fine powder…
Oh my gosh – how genius is this?!! Going to make this with my teen girls. So concerned about other unnecessary additives in their skin products. Thanks so much for breaking this down!
This was super easy to make but I can’t for the life of me get this to stick to my skin. Even when I moistened my skin first as suggested. It just rolls off my face. Any suggestions as to what might be wrong? I really want this to work for me.
I’m sorry you have having trouble. Boo! Most days I apply this over my face moisturizer, and some days my face foundation (recipe here). I don’t have issues. I’m curious…are you using a brush? I like using a brush. Do you need to add more of an ingredient to give you more color? Just brainstorming here. I’d love to help you figure out the issue.
I noticed you mentioned adding vit. E. I’m going to try that and see if that helps. Yes, I used a brush but it didn’t work. Also, I love your foundation but I did not try it after applying that. I’ll try both ideas and let you know how it goes. I really appreciate you getting back to me and trying to help. You’re awesome Jess!
Yes, of course! Happy to help. Give the foundation a try with the blush…powder over top is even better. Adding the vitamin e is great, too.
Those homemade powders look absolutely gorgeous! I would love to try this out at home — it’s always looked so intimidating to me. But your recipe makes it feel a little easier 🙂 Thank you SO much for sharing!
Such a neat idea! I never thought to DIY blush. I can’t wait to try!
When you say that you can add Vitamin E oil, do you add that to the blush? Won’t that change the texture?
Yay! Let us know when you give it a try! Great question…I add a few drops as I’m mixing it, just like I do with my DIY facial powder. It’s a small amount and doesn’t change the texture at all. Happy DIYing!
I love using natural makeup! How fun to make it yourself with such simple ingredients. Thanks!
Yes! That’s the best…using all natural *real* ingredients. 🙂
Always a good idea to use natural cosmetics! Thank you for the recipes!
I’ve just ordered your foundation and powder. Do you sell a blush product?
Hi Rose! I think you’ll love your new foundation and powder. I don’t sell this blush, but I do sell all of the ingredients to make it yourself (even the powder sifter). Make sure you’re signed up for my weekly newsletter and if I decide to add this into my product line I’ll let you know there. 🙂
I can’t seem to get the beet powder or hibiscus powder ground to a fine powder in my coffee grinder. It is still grainy. Is it my grinder?
Oh no! I think it could be the grinder. Are the blades a bit dull? I wonder if the grinder was too full, perhaps? I haven’t had this issue, but I think you could be onto something with the grinder. :/